Mastering barre chords opens up a world of possibilities. They allow you to take a single shape and move it around the neck to play chords in any key you like.
But barre chords can be tough to learn! They feel uncomfortable at first and it takes most people quite some time to master them. The most common advice is simple: practice, practice, practice.
But to make that practice effective, it’s important to have your technique in order. Especially if you’re learning online and don’t have a teacher to look at what you’re doing and correct you, there’s a chance your technique is making things more difficult than necessary. So in this article, I want to highlight a number of important technical aspects that will help you get your barre chords right.
1. Check your thumb, palm and wrist position
The position of your thumb, palm and wrist are all connected. Many people (myself included) find it comfortable to sling their thumb across the top of the guitar neck. Jimi Hendrix was famous for it and you’ll see professional players do it all the time.
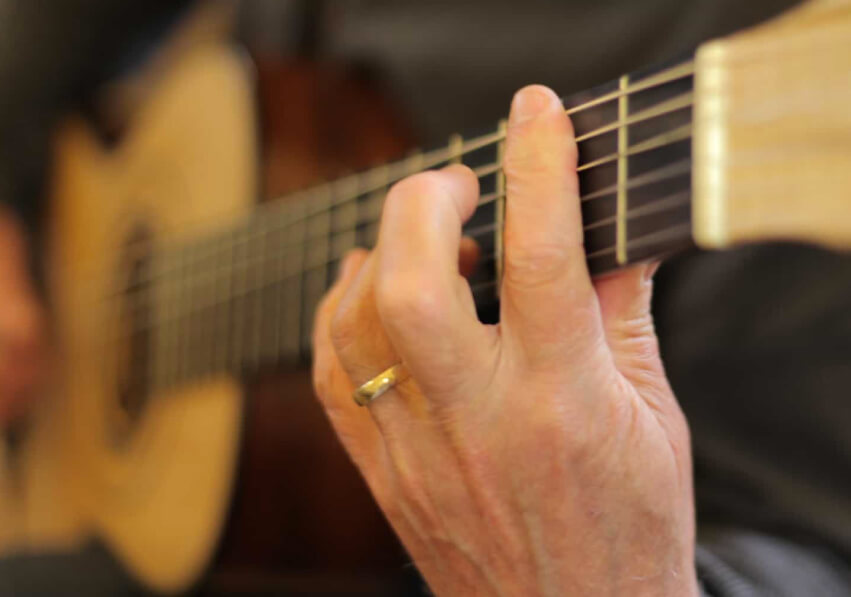
However, to play barre chords you need to place your thumb on the back of the neck. If you instead press your palm against the back of the neck, you won’t be able to stretch out your index finger across the strings. That index finger needs to have enough space to be completely straight from your knuckle to the tip of your finger.
If you’re doing this correctly, your wrist should be below the neck. However, be careful not to rock it too far forward and bend it too much. While your wrist should be below the neck, it should also be bent as little as possible, because bending your wrist makes it harder to use the strength in your hand and fingers. (Just try to bend your wrist and make a fist – feels awkward right?) Pointing the guitar neck slightly upwards can make this easier.
2. Keep your elbow close to your body
A common mistake is to keep your elbow away from your body. Some teachers call this the ‘chicken wing’. The problem this creates is that your fingers are in an awkward angle that makes it hard to apply pressure.
So here’s what to do instead. Drop your arm past the side of your body. Next, lift your hand up towards the fretboard. Your elbow should still be close to your body. Not pressed against it, but just relaxed. Maybe a few inches away from it. When you need to reach down the neck (i.e. towards the headstock), simply rock your forearm in that direction and keep the position of your elbow and upper arm the same.
3. Use the edge of your index finger
If your elbow is in the correct position, you’ll be able to slightly change the angle of your index finger. Instead of using the ‘flat face’, i.e. the front of your index finger to press down the strings, try to roll your finger over to its side just a little bit. This edge of your finger is a bit bonier and harder, making it easier to apply pressure to the strings. After rolling your finger slightly, it should feel a bit like you’re pushing towards the headstock of the guitar, instead of just pushing down onto the fretboard.
4. Move index finger up or down
Sometimes one of the strings will get caught in one of the creases of your finger. A simple fix is to simply move your index finger up or down. In other words, experiment with how much your index finger is sticking above the fretboard. For some people, the barre chord sounds best when it’s sticking out quite a bit, while other guitarists barely let their finger protrude at all. Everyone’s hands are different, so this is all about finding out what works best for you!
5. Use some arm strength
Sometimes the answer to your barre problems is just a little more strength. This might be especially true if you’re playing on an acoustic guitar with ‘high action’, which means the strings are far away from the fretboard.
Of course, there’s only so much power your hands can provide. Pressing really hard might make your barre chord sound clean, but chances are your hand (and especially your thumb) won’t be able to keep that up for long. Fortunately, there’s another way you can get some more strength: your arm.
Here’s how it works. First, take your right arm (your picking arm) and press the guitar body against your chest, gently but firmly. This will keep the guitar in place during the next step: with your left arm (your fretting arm) simply pull backwards. This should enable you to apply extra pressure to the fretboard without your thumb having to work harder. In fact, with this arm strength technique, it’s even possible to play a barre chord without using your thumb at all!
Practice, practice, practice…
Hopefully the technique tips above will help you avoid some of the common technical pitfalls when learning barre chords. You should know though that mastering barre chords requires more practice than some other aspects of playing guitar. So don’t get discouraged if it takes longer than you expected. That’s true for most people. It takes some getting used to this new technique, but a little practice every day goes a long way!


